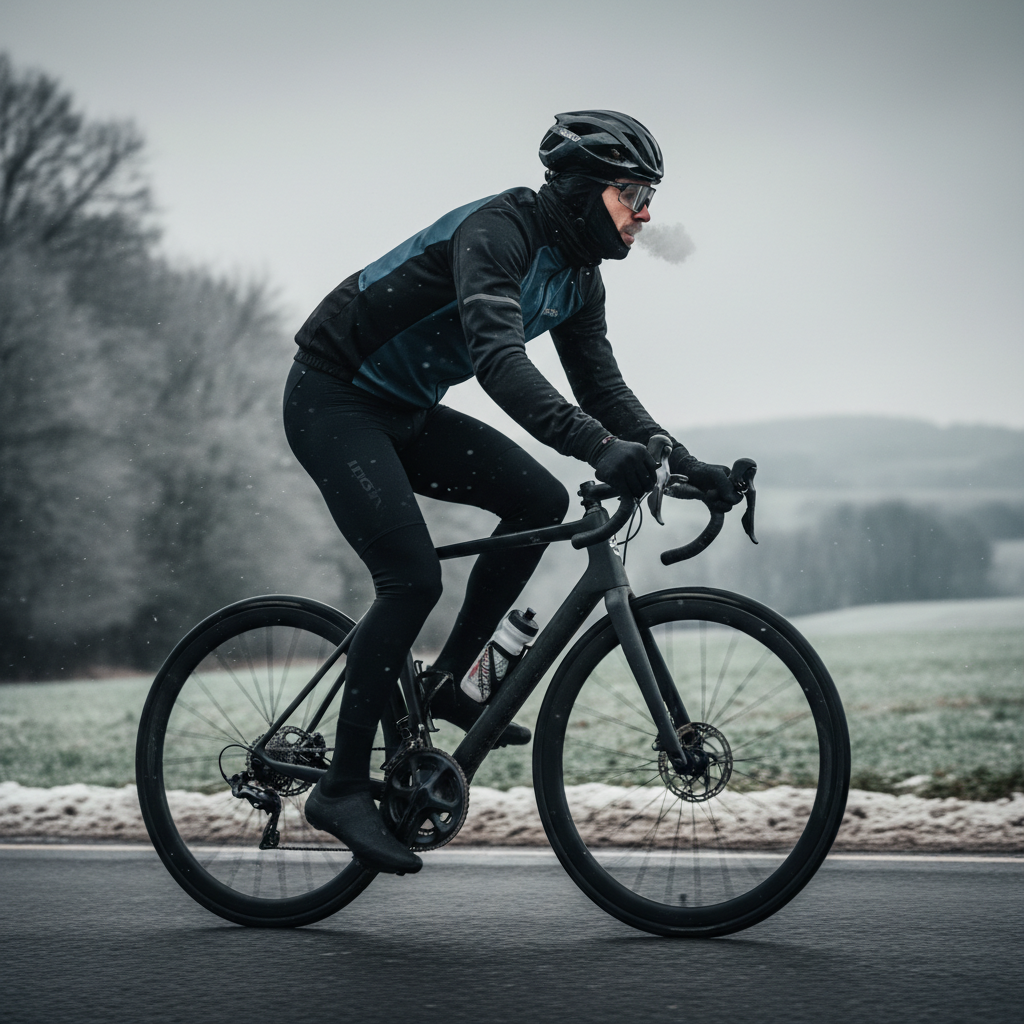
The best cycling leg warmers for winter are the ones that match your typical ride temperatures, your wind exposure, and how much you sweat, not just the priciest pair on a shelf.
If you have ever started a ride chilly, warmed up 20 minutes later, then ended up clammy on a descent, you already know why leg warmers are tricky, they sit right at the intersection of insulation and moisture control.
This guide breaks down what actually matters: fabric types, gripper design, panel fit, and when you should skip warmers entirely and go to tights, plus a quick checklist to choose confidently.
What Makes Winter Leg Warmers “Best” (Beyond Warmth)
Warmth matters, but comfort over two to four hours matters more. A “warm” warmer that slides down, binds behind the knee, or traps sweat can feel worse than bare skin.
- Thermal balance: enough insulation for your pace, without turning into a sauna when you push.
- Wind management: some wind blocking helps on descents, but full windproof panels can reduce breathability.
- Moisture handling: the fabric should move sweat away from skin so you do not chill when effort drops.
- Stay-put fit: solid thigh grippers and a shape that follows your pedal stroke.
- Layering compatibility: should pair cleanly with bib shorts, knee warmers, and shoe covers.
According to USA Cycling, smart layering and managing sweat are key to staying comfortable and avoiding getting chilled mid-ride, leg warmers live in that exact sweet spot.
Materials and Construction: What to Look For
Most winter warmers live in the thermal Lycra family, but small construction choices change the feel a lot.
Common fabrics (and what they feel like on the road)
- Brushed fleece thermal: the “standard” winter choice, soft inside, flexible, usually best for steady cold rides.
- Roubaix-style thermal: similar to fleece, often a bit denser, tends to feel warmer for the same thickness.
- Wind-panel hybrids: wind-resistant front with stretch thermal elsewhere, helpful if you descend a lot or ride open farmland.
- Merino blends (less common): can feel less clammy, sometimes less durable, pricing varies by brand.
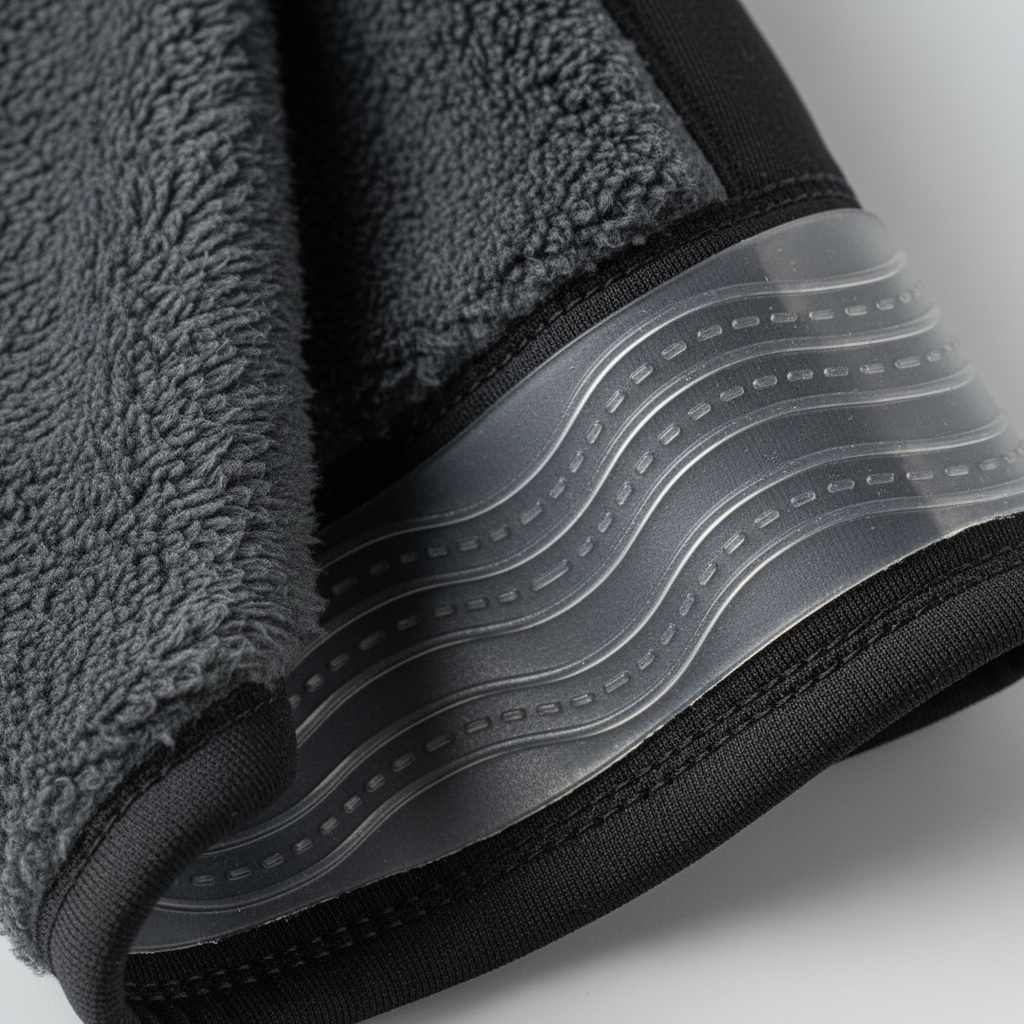
Seams, panels, and why they matter
- Pre-shaped panels: bend naturally at the knee, reduce bunching behind the joint.
- Flatlock seams: lower chance of rubbing, especially on longer rides.
- Ankle zips vs no zips: zips make on-off easier over shoes, but can create a pressure point if the zipper is bulky.
Quick Temperature Guide (Warmers vs Tights)
People often buy “winter” warmers expecting them to replace tights all season. In many parts of the US, they can, but only within a band of conditions.
| Ride conditions | What usually works | Notes |
|---|---|---|
| 45–60°F, variable sun/wind | Light leg warmers or knee warmers | Best for “cold start, warm finish” rides |
| 35–50°F, steady chill | Thermal leg warmers | Look for brushed fleece and solid grippers |
| 25–40°F, windy descents | Thermal warmers with wind panels | Breathability becomes the tradeoff |
| Below ~30°F or long wet rides | Thermal tights (often bib tights) | Warmers can gap, slip, or feel drafty |
Your personal “switch point” depends on effort level. If you ride hard and sweat easily, the best cycling leg warmers for winter might be a slightly lighter fabric than your friend swears by.
Fit Checklist: How to Tell If Yours Will Slide or Chafe
This is the part most riders only learn the annoying way, halfway through a cold ride, tugging at a thigh cuff in traffic.
- Thigh gripper width: wider tends to distribute pressure, narrow bands can cut in and roll.
- Grip material: silicone dots or a continuous silicone strip, both can work if the sizing is right.
- Knee articulation: when you bend the knee, fabric should not form a thick ridge behind it.
- Ankle interface: should overlap socks or shoe covers without leaving a gap that funnels cold air upward.
- Length: too long bunches at the ankle, too short exposes a cold strip at the calf.
Simple home test: put them on with your bib shorts, do 20 slow bodyweight squats, if the top cuff migrates down or the knee area twists, sizing or pattern is off for you.
Choosing the Best Cycling Leg Warmers for Winter: 4 Common Rider Scenarios
Shopping gets easier when you admit what you actually do. Your “winter” might be coastal damp, high-desert wind, or Midwest shoulder season.
1) You ride in cold, dry air and heat up fast
- Prioritize breathable brushed thermal over heavy windproof fronts.
- Avoid ultra-thick fleece unless you routinely ride near freezing.
2) You descend a lot or ride in open wind
- Choose a hybrid warmer with wind resistance on the front of the thigh and knee.
- Make sure the back panel stays breathable, that is where sweat builds.
3) You ride in wet roads, drizzle, or slushy spray
- Look for DWR-treated fabrics (durable water repellent) when available, it will not make you waterproof, but it can reduce soak-through.
- Pair with fenders when possible, it is the most underrated “warmth upgrade.”
4) You hate fussing with layers mid-ride
- Consider whether bib tights fit your winter better than warmers.
- If you still want warmers, pick a design with reliable grippers and easy ankle openings so removal is realistic during a stop.
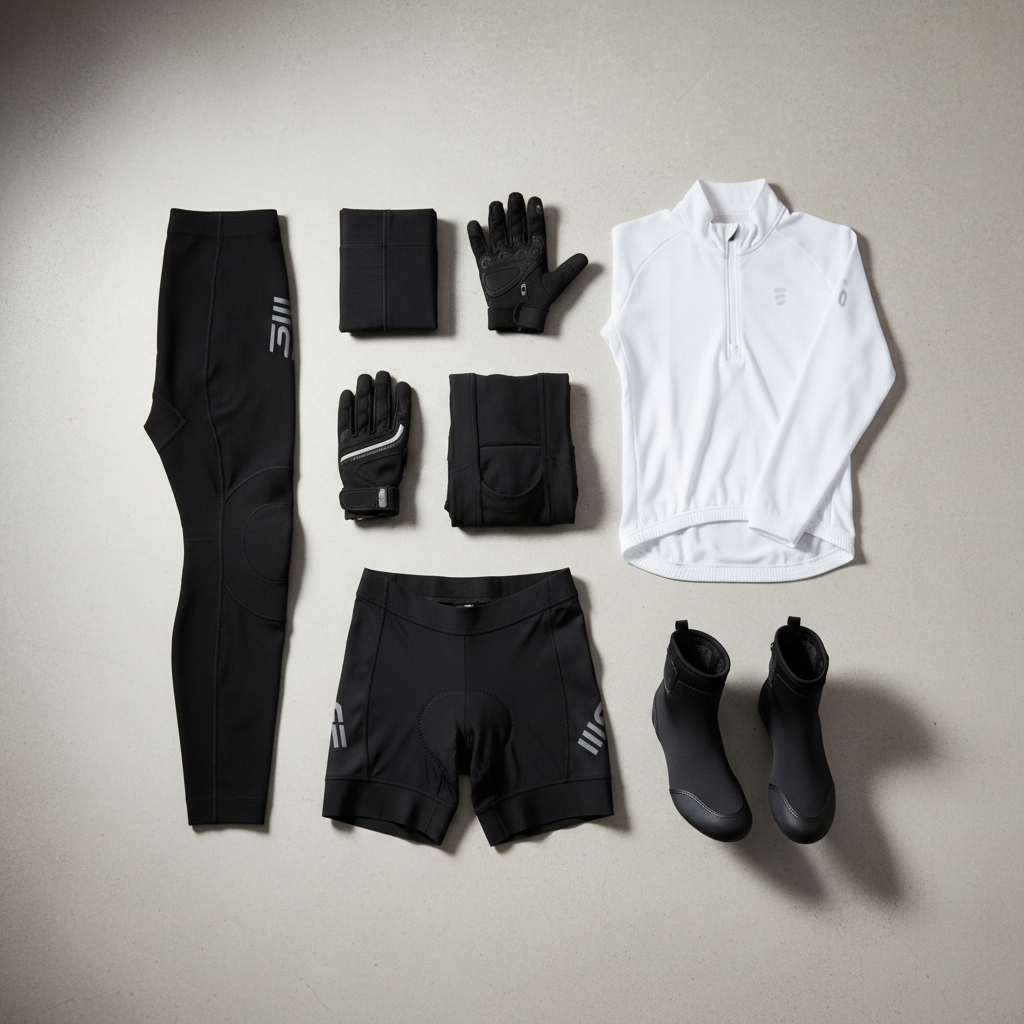
Practical Tips: Wearing, Layering, and Removing Without Hassle
Leg warmers are simple, but the little habits decide whether they feel “set and forget” or annoying.
- Put warmers on before bib shorts if you want the thigh cuff locked in place, it reduces sliding for many riders.
- Overlap by intent: warmer over sock by 1–2 inches, shoe cover over warmer if it helps seal wind.
- Plan removal: if your route warms up, pick a safe stop, roll downward evenly, avoid yanking from the top cuff only.
- Cold knees are real: if your knees ache in cold air, consider a warmer with a slightly denser knee panel, and if pain persists, it may be worth checking bike fit with a professional.
According to Centers for Disease Control and Prevention (CDC), cold exposure can contribute to cold-related stress; if you notice numbness, unusual pain, or loss of coordination, it is smart to warm up and reassess rather than pushing through.
Mistakes to Avoid (What Usually Leads to Regret Buys)
Most disappointment comes from buying based on one feature, like “windproof,” and ignoring the rest of the system.
- Going too warm: overheating often feels fine on the climb, then you chill on the descent because you are damp.
- Sizing down for compression: extra-tight cuffs can roll and cause hot spots behind the knee.
- Ignoring ankle sealing: a tiny gap can let cold air pump upward with each pedal stroke.
- Assuming all silicone grippers behave the same: grip depends on skin, hair, lotion, and how your bib short fabric interacts.
- Skipping care: fabric softener can reduce wicking and sometimes mess with grippers, many brands recommend avoiding it, check the label.
Conclusion: A Simple Way to Pick Yours Today
If you want a dependable answer, choose thermal brushed warmers when your rides live in the 35–50°F range, go hybrid when wind is the bigger enemy, and switch to tights when cold and wet stack up for hours.
Key takeaways:
- Focus on breathability + fit as much as insulation.
- Match fabric to your real conditions, not the coldest day you can imagine.
- When in doubt, prioritize a stay-put thigh cuff and a clean ankle seal.
If you are shopping right now, write down your usual start temperature, average wind exposure, and whether you sweat easily, then use the scenario section to narrow options, that is often enough to land on the best cycling leg warmers for winter for your rides.