How to install bike hooks on wall comes down to two decisions: whether you’re mounting into a stud or into drywall, and whether your hook style matches your bike’s weight and tires. Get those right and the rest is mostly careful measuring and drilling.
If you’ve ever had a hook pull out overnight, chip drywall, or leave a bike hanging crooked, you already know why this matters. A wall mount is supposed to save space, not add anxiety every time you walk past it.
This guide walks through the common wall types in U.S. homes, how to find solid structure, what hardware actually holds, and a step-by-step install that doesn’t assume you’re a contractor. I’ll also point out the spots where people “feel” like they did enough, but the wall disagrees a week later.
Pick the right bike hook for your wall and bike
Not all “bike hooks” behave the same once they meet a real wall. The right choice depends on tire width, bike weight, and whether you want vertical storage (front wheel up) or horizontal storage (two points of support).
Common hook types (and when they make sense)
- Single J-hook (vertical hang): Simple and cheap, but puts more load on one anchor point. Works best when you can hit a stud.
- Wide hook for fat tires: Same idea as a J-hook, just sized for 3–5 inch tires so the bike seats safely.
- Two-hook horizontal system: Distributes load across two mounting points, often easier to level, good for heavier bikes if installed correctly.
- Rail-based systems: Lets you slide hooks along a track, great for multiple bikes and changing layouts, but requires careful leveling.
Key takeaway: if the plan is “one hook in drywall,” you’re betting a lot on the anchor. Many situations go smoother when you plan to mount into studs or use a horizontal system that spreads load.
Tools and hardware checklist (what you actually need)
You can install wall bike storage with basic tools, but missing one item is where people start improvising, and that’s when holes multiply.
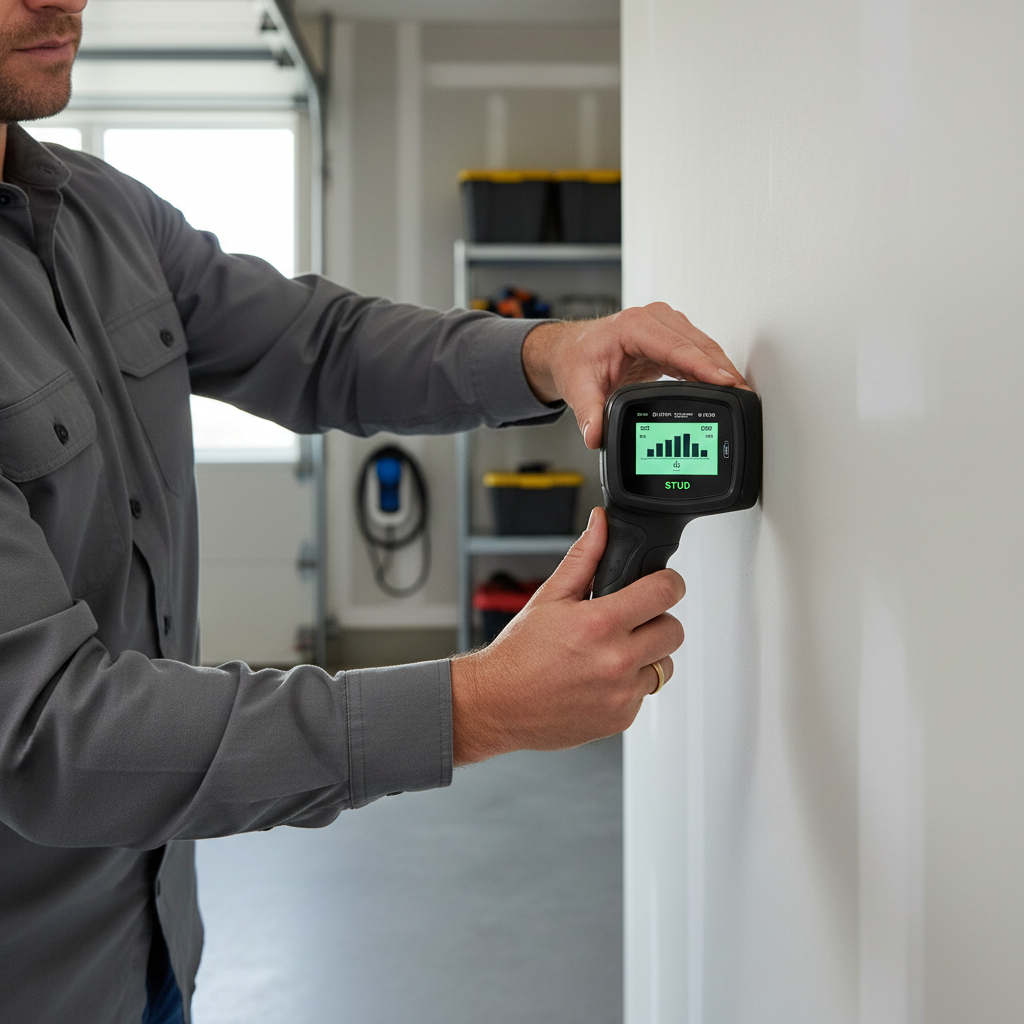
- Stud finder (plus painter’s tape and a pencil for marking)
- Drill/driver and drill bits (wood bit for studs, masonry bit for concrete, correct pilot size)
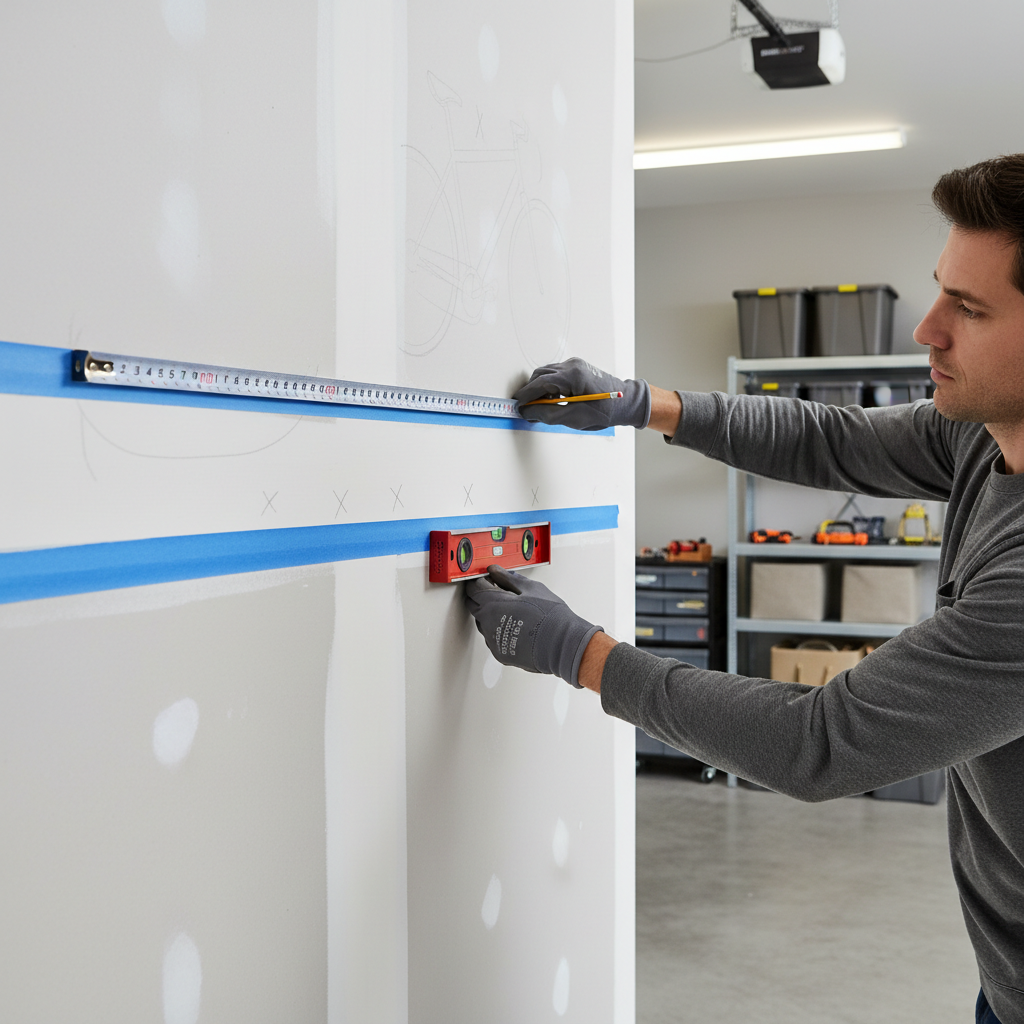
- Level (small torpedo level works)
- Tape measure
- Socket/wrench if your hook uses lag bolts
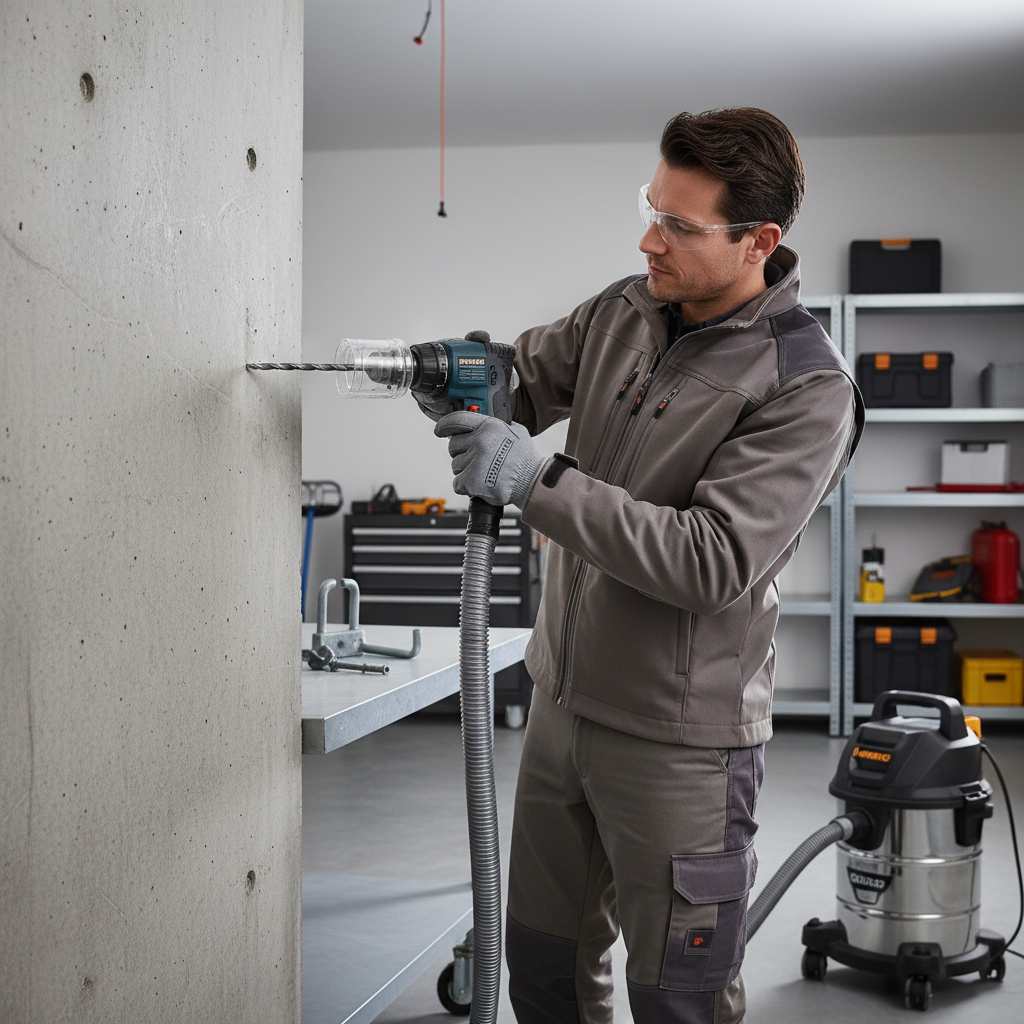
- Vacuum or dust brush (especially for masonry drilling)
For hardware, follow the hook manufacturer’s specs when they’re clear. When they’re vague, anchor choice matters more than the hook itself.
| Wall type | Preferred fastening | Notes |
|---|---|---|
| Drywall over wood studs | Lag screw into stud | Most reliable for vertical hooks; drill a pilot hole to reduce splitting. |
| Drywall with no stud available | High-quality toggle bolt | Better than basic plastic anchors; still avoid for very heavy bikes if possible. |
| Concrete / block | Concrete screw or sleeve anchor | Use a masonry bit and clean dust from holes for better grip. |
| Brick | Masonry anchor into brick (not mortar) | Mortar can crumble; drilling into brick usually holds better. |
Before you drill: a quick self-check to avoid the usual mistakes
Most “failed installs” were predictable with a 60-second check. Run through this before you commit to holes.
- Can you hit a stud? If yes, do that and simplify your life.
- Is the bike heavier than you think? E-bikes and some mountain bikes can be surprisingly heavy, and weight changes anchor choice.
- Will the bike clear handlebars, pedals, and seat? Leave extra side-to-side space, especially for drop bars.
- Is the tire clean enough for indoor walls? If not, consider a wheel tray or a small wall guard.
- Are you near wiring/plumbing? Garages and utility rooms can hide surprises; be cautious if you’re drilling near outlets, switches, or water lines.
Step-by-step: how to install bike hooks on wall (stud mount)
This is the most forgiving method, and for many homes it’s the standard approach. You’re using the framing lumber to take the load, not just the drywall.
1) Find and confirm the stud
Use a stud finder, mark both edges, then mark the centerline. If you want extra confidence, a small finish nail test hole can confirm you hit wood, but keep it minimal and patchable.
2) Set the mounting height
A vertical hook usually places the front wheel high enough that the rear wheel doesn’t kick out and mark the wall. Measure your bike height wheel-to-top when tilted, then add a little breathing room so you’re not fighting it every time.
3) Pre-drill a pilot hole
Drill a pilot hole sized for your lag screw’s core diameter, not the outer threads. This helps the lag bite without splitting the stud and makes the hook easier to drive straight.
4) Install the hook and snug it down
Drive the lag screw until the hook base sits flat to the wall and feels solid. Don’t over-torque to the point you crush drywall around the base.
5) Test before hanging the bike
Pull down and out on the hook with firm pressure. You’re looking for any flex, crunching, or movement at the wall surface. If it shifts now, it will shift more with daily use.
Quick tip: For two-hook systems, level matters. A small tilt becomes obvious once a bike is hanging, and you’ll feel it every time you lift the frame on and off.
If you can’t hit a stud: drywall anchors that are more realistic
Sometimes the stud spacing doesn’t match where you need the bike to go, or the wall is finished in a way that makes stud mounting awkward. In those cases, use anchors that spread load behind the drywall.
Toggle bolts (often the better drywall choice)
Toggles clamp the backside of drywall instead of relying on threads biting into gypsum. They tend to outperform small plastic expansion anchors for heavier, dynamic loads like lifting a bike on and off.
- Drill the correct hole size for the toggle, don’t “make it work” with a smaller bit.
- Keep the hook base tight to the wall, gaps increase leverage and wall damage.
- If the drywall feels soft, crumbly, or damp, treat that as a red flag.
Better option: mount a board to studs, then mount hooks to the board
When you want hook placement freedom but still want real strength, a simple backing board solves it. Screw a 1x4 or 1x6 into two studs, then attach hooks wherever you want along the board.
This also reduces the “Swiss cheese wall” effect, because future changes happen on the board, not the drywall.
Concrete, brick, and block walls: what changes
For masonry, the steps are similar, but the drilling and anchoring are different. Dust management is not optional, and the bit choice matters.
- Use a masonry bit, ideally with a hammer drill for concrete.
- Drill to the correct depth, then clean out dust so anchors seat properly.
- For brick, many installers prefer drilling into brick face rather than mortar because mortar can be weaker or uneven.
According to OSHA, employers should use appropriate personal protective equipment when performing tasks that create dust or flying debris. For home projects, that generally translates to eye protection and, in dusty conditions, a respirator that fits properly.
Safety and longevity: small details that keep the hook solid
You can mount a hook “correctly” and still end up with wobble if the daily use pattern is rough on the wall. Bikes don’t just weigh something, they also swing and torque when you lift them.
- Avoid side-loading: Don’t yank the bike sideways off a vertical hook, lift up and out.
- Protect the wheel rim and wall: Many hooks have a rubber coating, check that it won’t cut into carbon rims or delicate finishes.
- Watch for drywall compression: If the hook base slowly sinks into drywall, you need a better mounting method.
- Re-check fasteners: A quick snug after the first week often prevents long-term loosening.
If you have concerns about wall condition, hidden utilities, or you’re mounting a very heavy bike, it may be worth asking a handyman or contractor. It’s not about skill pride, it’s about risk management.
Practical install examples (so you can copy a setup)
Sometimes the hardest part is deciding where the bikes go in a tight garage. Here are a few setups that tend to work in real homes.
One bike, drywall over studs
- Goal: easiest, strongest install
- Method: one vertical hook into a stud, plus a small wall bumper where the rear tire touches
Two bikes, mixed frame sizes
- Goal: avoid handlebar conflicts
- Method: two vertical hooks into two different studs, stagger heights by several inches
Three or more bikes
- Goal: flexible spacing
- Method: backing board into studs, then multiple hooks on the board, optionally alternate heights
Conclusion: a solid wall mount is mostly about the anchor choice
How to install bike hooks on wall is straightforward once you stop treating all walls the same. If you can mount into studs, do it and use a pilot hole so the lag screw seats cleanly. If you can’t, choose a drywall anchor that spreads load, or step up to a backing board to keep the setup reliable.
Your next action: locate studs and decide your hook layout on painter’s tape first, then drill only after you’ve checked clearance for handlebars and pedals. That small pause usually saves the most rework.